Lavandula: Learn Where To Plant, How To Care, Grow And Prune Lavender Plants
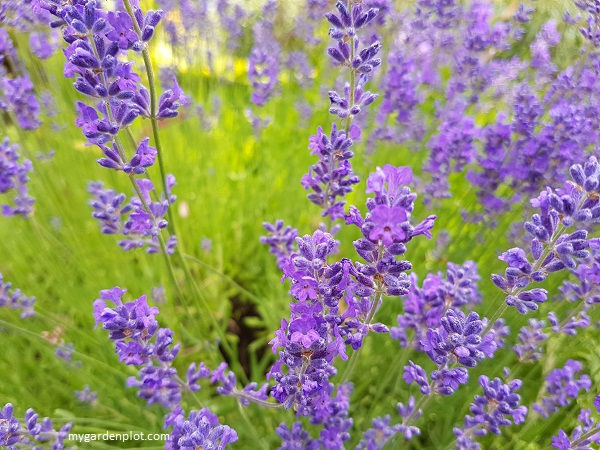
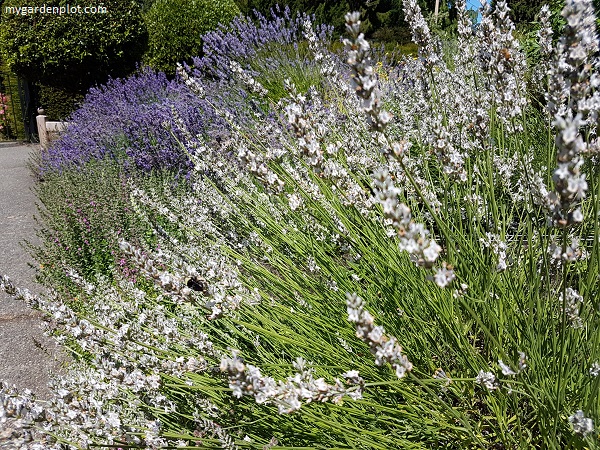
Lavandula, more commonly known as lavender, is famous for its fragrant flowers and foliage. Like rosemary, a brush against the foliage is enough to release the lavender scent. It is long-blooming, and their purple, blueish and sometimes pinkish-white flowers, contrasting against the dark green or greenish-gray foliage, never fail to impress in a summer garden. Below are tips on where to plant a lavender shrub, and how best to grow, care and prune lavender at the end of the season.
This evergreen shrub is native from the Mediterranean region, northern Africa and western Asia. Lavender has a reputation for being short-lived as it generally needs to be replaced every six to eight years – however, some have lived to 20 years or so. It is an easy-care, low maintenance plant that is drought tolerant and deer resistant. The English lavender almost thrives from gentle neglect. However, the French or Spanish lavender is not as hardy as the English lavender and does need to be placed in a protected frost-free site during winter. The versatile lavender grows well in containers, flower beds or in a edible garden.
By providing intense sun, perfect drainage, and consistent annual pruning, you’ll enjoy beautiful, fragrant, and long-lived lavender plants.
Deer And Pest Deterrent
Lavender is not only deer resistant but likely not to be troubled by any insects or disease problems. It repels codling moth, ticks, fleas, whitefly and mosquitoes. Additionally, it is a bee-magnet and a significant draw for beneficial insects in a garden.
Lavender’s Many Uses
Lavender is one of the oldest herbal plants on a gardener’s favoured-list. It is valued for its defining ornamental presence and delightfully aromatic lure in a summer garden. But it is more than just a beautiful scented plant, it is a ‘honey plant’ that is important to various types of bees, and a must in any pollinator-friendly garden. Its popular fragrance is used in lotions and soaps, dried for potpourri, and distilled into lavender oil.
It is a culinary herb and medicinal plant that has been used for centuries for its relaxing properties. It is also recognized for its antiseptic and antibacterial actions. The flowers are edible, too, with a mild peppery flavour. A few lavender sprigs add a lovely taste to any roast – use sparingly as it can be overpowering. And can even be used as a flavouring in ice-cream, cakes and cookies.
See more information below about cutting lavender for drying.
Lavender At A Glance
Type: Evergreen
Location: Full sun (at least 6-8 hours direct sun daily)
Blooming season: May-August
Height: varies by type – up to 1.2 metres (4 ft) and equal spread
When To Prune: Spring / Late Summer (see trimming details below)
Plant Hardiness Zones: 5, 6, 7, 8, 9
Where To Plant, And How Grow And Care For Lavender
Lavender thrives in full sun and well-drained soil. It can tolerate some shade but must have at least 6 hours of direct sun daily. Less sun leads to weak, leggy growth and fewer blooms.
The best time to plant your new lavender is in spring after any frost risk, or early fall in mild climates. Nothing is more critical for your lavender in the Pacific Northwest than drainage – boggy and waterlogged gardens will kill your lavender by the end of the season. This is non-negotiable. Lavender hates “wet feet” and will quickly rot in heavy, soggy clay soil. It can survive the rainy season so long as drainage is good.
They can tolerate most soil types but best in ordinary soil – fertile or acidic soil or even poor conditions may be tolerated but may hinder its growth or scent strength. Don’t add high-nitrogen fertilizer, and avoid rich, organic soils. Sandy or gravelly soil is ideal. Lavender prefers slightly alkaline soil (pH 6.5 – 7.5). If your soil is acidic, add a little garden lime. Improving drainage by amending heavy clay soil with large amounts of coarse sand, grit, gravel, or fine crushed rock but not play sand. Raised beds are excellent. For pots, use a gritty cactus/succulent mix or regular potting soil amended heavily with perlite or pumice. Use inorganic mulch like gravel, pebbles, or sand. This reflects heat, improves drainage, and keeps foliage dry. Avoid organic mulch (bark, compost) which retains moisture and can cause rot.
Give plants ample space (usually 2-3 feet apart, depending on variety) for air circulation to prevent disease. Plant at the same depth it was in its nursery pot. Do not bury the crown.
Besides adding a small amount of balanced bone meal when planting, I give our lavender very little fertilizer. Fertilizing is rarely needed and can be detrimental. Over-fertilizing leads to soft, floppy growth and fewer flowers. If soil is very poor, a light application of compost or balanced fertilizer once in early spring is sufficient. Usually, topping up with compost early spring once a year is just about all it needs.
Once established, your lavender will prove itself as being drought resistant, though it would thrive with a regular water once or twice a week. Water deeply but infrequently for the first year to encourage deep roots. Overwatering is the fastest way to kill lavender. Reduce watering significantly in fall/winter.
Lavender used in container gardening need to receive regular watering, especially during hot summer weather. To not allow your potted lavender to dry out.
Your take away: sunlight is crucial, soil and drainage are key and water wisely.
Cool Tip For Keeping Lavender Plants Healthy
Often you will read that lavender can just be planted in a sunny site and left alone. Now, while lavender is easy-care, low maintenance aromatic herb plant, it does need to be placed in the right location and planted correctly. It dislikes hot and dry conditions, or hot and humid conditions. The misconception lies in that lavender likes hot weather due to where they come from. They want the sun but not intense heat. A sunny, cool summer is ideal.
Pruning Lavender
Pruning lavender is essential for longevity and keeping its shape. Why Prune? It Prevents plants from becoming leggy, woody, and splitting open. Encourages bushy, compact growth and promotes more flowering. Pruning also extends the plant’s lifespan significantly (a well-pruned lavender can live 10-15 years or more).
Key Pruning Visuals: Think “Green is Good, Brown is Bad” when deciding where to cut. Always aim to keep the plant looking like a compact, leafy mound, not a bare stick with a puff of green on top.
The Two-Step Pruning Method is Best:
Step 1: Remove Flower Stems: Cut off the spent flower stalks down to the top of the leafy growth. Use secateurs or shears.
Step 2: Shape the Foliage: This is the critical cut for plant health.
When and How to Prune:
In late summer or early autumn, give your lavender a light trim removing the old flower stems as blooms fade will keep it tidy – trim the flower stems about 5 cm (2 inches) above the leafy green growth on the same stem. But don’t cut back to thick old, woody stems, as lavender will struggle to bounce back. Similar method as pruning heather and heath plants. An overall trim will lead to healthy new stems next spring. Pruning in late summer or early fall gives new growth time to harden off before winter. In colder zones (5-6), do this by early September.
If your lavender was not trimmed in the previous autumn which is the ideal time, then a light trim will be needed in spring to tidy any winter damage or straggly tips. Only light pruning is needed to promote flowering and to keep your lavender shrub compact. Be very conservative here – only remove dead tips or clearly dead stems. Don’t cut back hard in spring. Pruning done in spring can encourage a healthy habit with new shoots coming from the base. Cut out any weak or damaged stems and trim back to about half its length. This will encourage bushy habit with more vigorous shoots.
The goal is to reduce the overall leafy mound by about one-third. Imagine aiming to leave a compact, rounded shape. For a visual, find the lowest points where you see new, tiny side shoots emerging from the main stems (usually within the green leafy part). Prune just above these tiny new shoots. Crucially, always leave at least 1-2 inches (several centimeters) of soft, green leafy growth above the hard, bare, woody stems.
Eventually, your older lavender may become too woody and straggly, and at that point, it will need to be replaced. Rejuvenation pruning an overgrown or woody lavender is risky. If a plant is very woody and neglected, it likely will not respond well to hard pruning. In early spring, carefully examine the plant. Look for any signs of tiny green buds (nubs) low down on the woody stems. Prune back to just above these buds. You may need to cut into some bare wood, but only where you see active buds. Success is not guaranteed. Some stems may not regrow. Cutting back to old bare wood will not promote new growth, unfortunately. It is often better to replace very old, woody plants.
Remember the Golden Rule when pruning your lavender: NEVER cut back into the old, bare, woody stems. Lavender struggles to produce new growth from old wood. Always leave some green growth, and never cut into the brown wood.
Tools Needed For Pruning Lavender
Below is the list of essential tools needed to prune your lavender plant. For the most part you will just be trimming your lavender to promote flowering and keep it bushy. Follow the natural rounded shape of the plant and Use sharp bypass pruners or hedging shears for large plantings. Make clean cuts. The plant should look smaller but still have a good amount of green foliage.
- Pruners – Bypass pruners are the most popular choice for gardeners and a must for removing spent flowers from your lavender.
- Hedging Shears – You will need a standard pair of shears for trimming the ends and keep the lavender plant compact and healthy.
BUYER’S GUIDE: How To Choose Garden Hand Pruners (Secateurs)
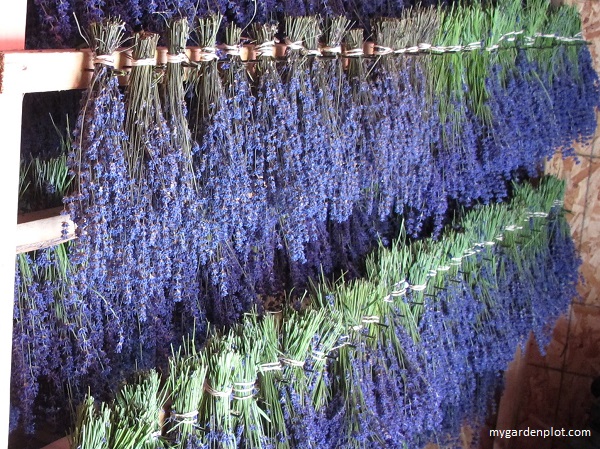
Drying Cut Lavender: Fill your home with the fresh scent of lavender
Harvest at the Right Time:
Prepare Bundles:
Hang to Dry:
Hang the bundles upside down in a location that is dark away from direct sunlight, to preserve vibrant color (light fades it). Is warm to speed drying and dry which is essential to prevent mold. It is critical for good air circulation. Well-Ventilated attics, closets, spare rooms, or covered porches are ideal. Even your garage can be used. Avoid humid basements or bathrooms. Use hooks, nails, or a clothesline/drying rack for hanging your lavender bundles. Ensure bundles aren’t touching walls or each other for optimal airflow.
Important Tips for Success:
- Airflow is King: This is the single most important factor to prevent mold.
- Avoid Sunlight: Direct sunlight bleaches color and degrades fragrance.
- Small Bundles: Resist the urge to make large bunches. Mold thrives in the center.
- Rubber Bands: They are more effective than string as stems shrink.
- Patience: Slow air drying preserves the best scent and color.
- For Culinary Use: Ensure lavender was grown without pesticides/herbicides labeled for ornamental use only. Wash gently before drying only if absolutely necessary (and pat dry thoroughly) but ideally harvest clean.
Enjoy your dried lavender! Use it in sachets, potpourri, cooking/baking, teas, bath products, crafts, or simply as beautiful, fragrant decorations. Excellent for potpourri or as dried flowers in a vase to bring in that summer lavender fragrance into your home.
Winter Care
Drainage is paramount. Prevent winter wetness around the crown. Add a light layer of gravel around the base (not touching stems) can help. Snow can be a good insulator in cold zones.
Do not prune hard late in the season; new growth will be vulnerable to frost. Avoid pruning in winter.
Variety Selection
Choose a variety suited to your climate.
- English Lavender (Lavandula angustifolia): Hardiest (Zones 5-8), best fragrance, best for culinary use and cold winters. Examples: ‘Hidcote’, ‘Munstead’ – my favourite ‘Super Blue’
- Lavandin (Lavandula x intermedia): Larger plants, long stems (good for drying), very fragrant (Zones 5-8). Examples: ‘Provence’, ‘Grosso’
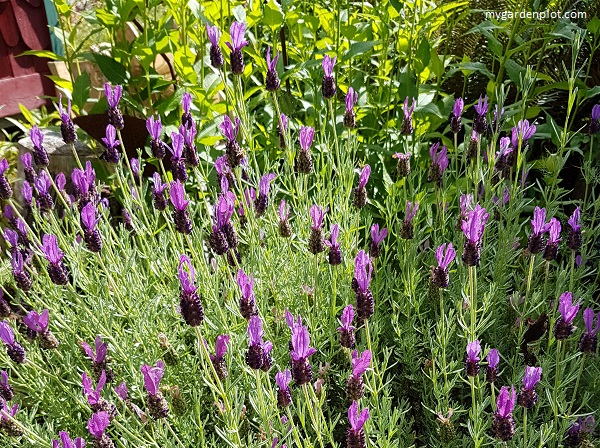
- French/Spanish Lavender (Lavandula stoechas, dentata): Less hardy (Zones 7-9 or higher), showy bracts (“rabbit ears”), prefer warmer winters. Tolerate more humidity than English types
Lavender Companion Plant Ideas For Your Garden Bed