Clematis Care And Practical Needs
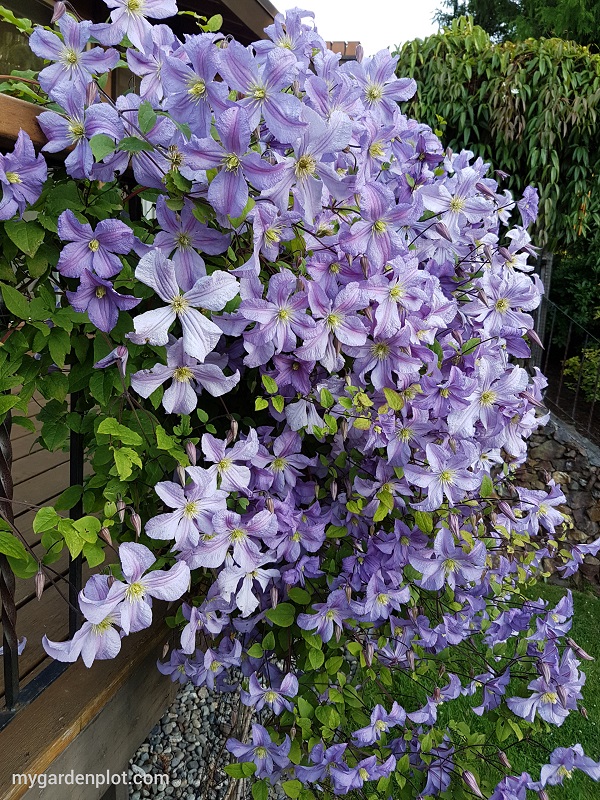
The much-loved clematis grows very well in our corner of the world in southern British Columbia. Cool moisture-retentive but well-drained soil and relatively mild summer months make it an ideal for this popular vine. Twisting through trees or weaving their stems around a pergola, the queen of flowering climbers, is spectacular. With hundreds of species, hybrids, and varieties offering different blooming periods, it is easy to understand why this beautiful plant is one of the most popular vines worldwide.
Below we break down the clematis care and tips, when and how to prune clematis, what pruning tools and support ties are needed, and practical requirements for each of the three clematis groups.
Clematis are mostly deciduous, though, there are a few evergreens that are outstandingly beautiful and fragrant.
There is a wide range of clematis varieties and likely some new hybrids to choose from suitable for your region. The easiest way to narrow down your selection is by first establishing when you want it to flower, and then by your colour preferences. As many gardeners will tell you, seldom are we happy having just one clematis plant. Once you have one, you will want another one!
Clematis Blooming Seasons
There is a wealth of fascinating botanical details for botanists and horticulturists defining the clematis species. To cut through this, the clematis types are more typically presented under the following three groups:
- Group A (or group one) – For early-season flowering clematis. Produces blooms on old wood from winter through to mid-spring.
- Group B (or group two) – For mid-season flowering clematis. Produces blooms on old wood and new stems from late spring to early summer.
- Group C (or group three) – For late-season flowering clematis. Produces blooms on new stems only from mid-summer to late autumn.
The Golden Rule of Clematis: "Head in the Sun, Feet in the Shade"
Growing clematis is incredibly rewarding. They are magnificent vines that can add stunning vertical color to any garden. The key to success is understanding their one simple, non-negotiable rule: “Head in the Sun, Feet in the Shade”
The vine and flowers love sunlight (at least 6 hours a day), but the root system must be kept cool and moist. How to achieve this:
- Plant a low-growing shrub or perennial in front of the clematis’s base.
- Add a layer of mulch (like bark chips or compost) around the base, but keep it a few inches away from the stem.
- Use a flat stone to shade the root area.
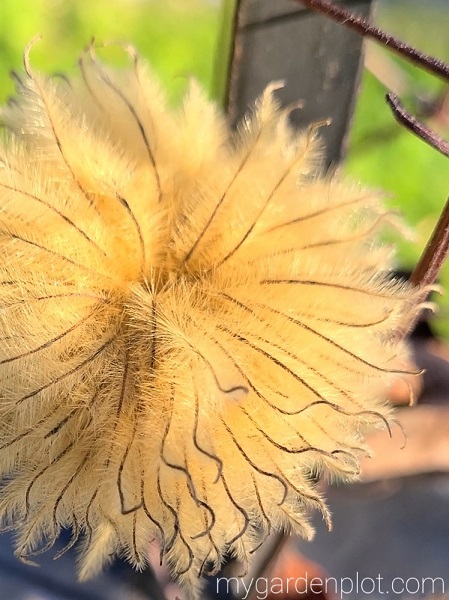
Interesting Fact About The Clematis Flower
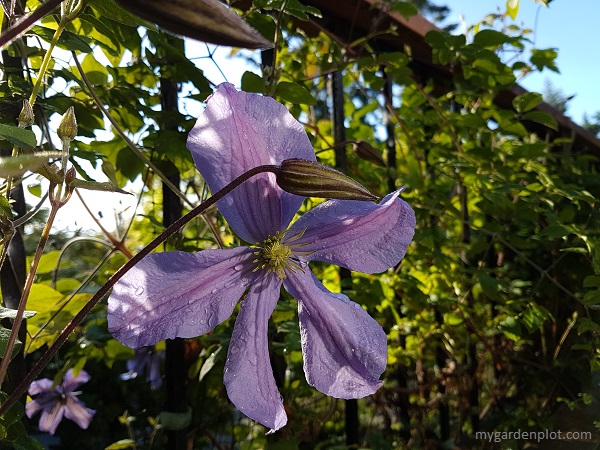
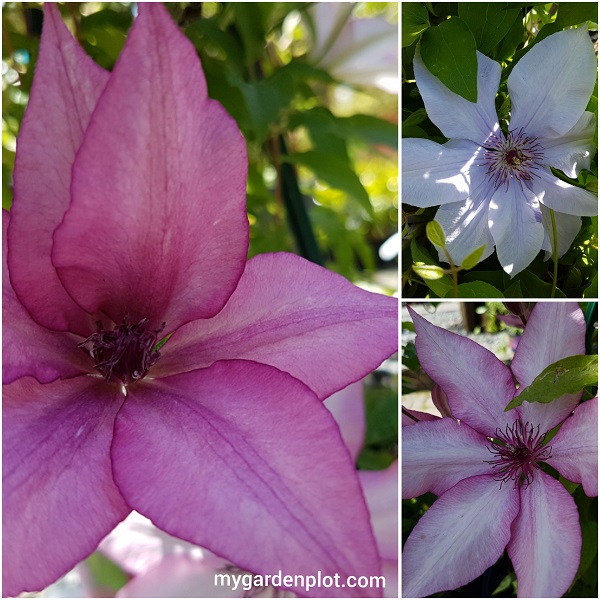
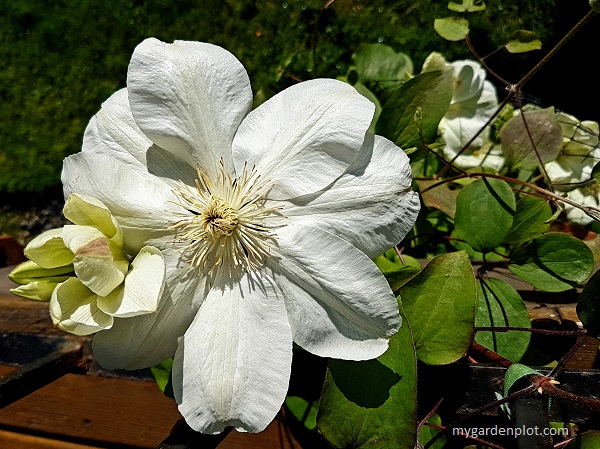
The clematis flower does not actually have petals. What you see is the appearance of petals, which is the flower’s sepals – this is generally the most dramatic part of the clematis flower. These sepals are known as ‘tepals’. The colours vary widely from whites, yellows, and pinks through to purples and deep reds.
Clematis At A Glance
Type: Mostly Deciduous, Perennials / Few Evergreens
Location: Full Sun – Partial Sun
When they bloom:
- Group A – Early spring on old wood (last year’s growth)
- Group B – Late spring/early summer on old wood, and often again in late summer on new wood
- Group C – Summer or fall on new wood (the current season’s growth)
Size: Varies
When to Prune:
- Group A – Early-Flowering Clematis – Late Spring / Early Summer
- Group B – Midseason-Flowering Clematis – Late Winter / Early Spring
- Group C – Late-Flowering Clematis – Late Winter / Early Spring
- Group A – Little to no pruning needed. Immediately after flowering, you can tidy them up or control their size. If you prune them hard in late winter, you will cut off all the flowers
- Group B – Light pruning in late winter/early spring
- Group C – The easiest group! Hard prune in late winter/early spring
Cold Hardiness Zones: 4, 5, 6, 7, 8, 9
Where To Plant And How To Care for Clematis
Plant your new clematis during spring to take advantage of the warmth and growing season to establish it before winter. When planting clematis in your garden, there are three things to keep in mind the amount of sunshine the location gets, soil requirements, and the structure to support it.
Most clematis types prefer a sunny or partially sunny spot. Though there are a few varieties that can adapt to a shady location – these tend to be the spring-flowering types.
Humus-rich, well-drained soil is needed and where the roots can be kept cool. In the past, gardeners would cover the area with stones to help keep the roots cool. This may be okay for an east-facing location where there is shelter from the mid-day hot sun. But a south-facing site in full sun is likely going to heat up the stones too much and increase the risk of drying out. In essence, the top of the clematis wants sun while its roots are kept cool and well-watered.
The clematis vine needs support to grow. It can be planted at the base of trees, fences, and walls, or trained to ramble over a pergola or trellis, or even recycled support forms – anything upright will do. With a little planning, these structures placed in the right location can help keep its roots cool while allowing the clematis to reach up for the full sun. Smaller varieties suitable for containers can be easily supported with a garden store or homemade tripod of bamboo canes. The creative range of support methods and ideas are endless.
The clematis is relatively easy to care for and is seldom troubled, aside from stem rot.
In late winter, add compost or manure to the base of your clematis, but avoid putting it up against the main stem of the plant. If possible, work the compost into the soil. Mulch around the area of the clematis will help retain soil moisture as the weather warms up.
And now, the pruning tips! Scroll down the page for when and how to prune your clematis.
Step-by-Step Summary
Planting for Success
- Plant in spring or early fall when it’s mild.
- Dig a hole deeper and wider than the pot.
- Clematis need well-draining, alkaline soil; mix in compost and slow-release fertilizer, plus garden lime if needed.
- Plant 2–4 inches deeper than in the pot, burying the first leaf nodes to promote roots and protect against wilt.
- Water deeply and add support at planting to avoid later root damage.
Ongoing Care
- Watering: Keep soil moist, focusing on deep watering, especially during the first season or dry spells.
- Feeding: Clematis need lots of nutrients.
- Spring: Use slow-release or rose/tomato fertilizer when growth starts.
- Mid-season: Feed again after first blooms for more flowers.
- Mulching: Refresh mulch yearly to cool roots and prevent weeds.
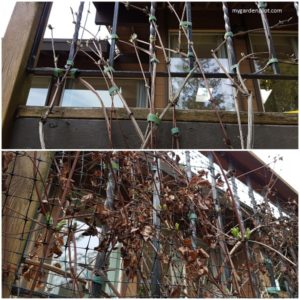
Ties, Support Trellis and Training Clematis Vines
Clematis climb by twisting their leaf stalks around something. Provide supports that are thin enough for them to grasp (less than 1/2″ in diameter). For ties we prefer to use velcro ties for support; they are reusable, secure but, better yet, gentle on young stems where needed.
For more robust support, we use flexible wire ties that are covered with a soft covering. Particularly for our evergreen clematis, we used the flexible wire ties on stems to remain positioned for a long time. Easy to remove if we need it but strong enough to last a long time.
Good supports include trellises, obelisks, wire mesh, arbors or even through other shrubs and trees. When training, gently tie the young vines to the support with soft twine to help them get started.

When and How to Prune Clematis
Clematis, for the most part, are vigorous growers. Some pruning is needed to regulate growth. If you don’t know the variety, a good rule of thumb is to observe when it flowers. Each group has slightly different needs. As well, this maintenance pruning helps coax the stems on their support structure. Regardless of which type, most young clematis plants will benefit from pruning back to about 30 cm (12 inches) from the base. This encourages stronger shoots from ground level and a bushy habit growth. Once your plant is more established, following is an overview of pruning requirements by group:
- Group A (or group one) Early-Flowering Clematis – Less pruning is needed for earlier blooming clematis. For length reduction or structural pruning, start soon after flowering in late spring or early summer. Cut back where required to a healthy bud. This group flowers on old wood and leaving to prune until later in the year can remove next year’s flowers. Remove any older or stray shoots to maintain a balanced and tidy framework.
- Group B (or group two) Midseason-Flowering Clematis – The best time to prune is late winter or early spring. Minimum amount of pruning for mid-season bloomers is generally needed. Light annual pruning will help keep it tidy and limit straggly stems. Remove any deadwood or any thin, weak growth. Cut back remaining stems to a pair of strong, plump buds. Tip: For a earlier, larger first flush of flowers, do a lighter prune. For a more balanced display, you can cut back harder every few years.
- Group C (or group three) Late-Flowering Clematis – Schedule in regular pruning in late winter or early spring, preferably before new shoots form. This encourages the production of new shoots where late-season flowers form. Check for dead or damaged stems and remove them too. Pruning also helps control the height. It can handle cutting right down to about 30 cm (12 inches) from ground level. Don’t be shy! This encourages vigorous new growth that will flower the same year.
Clematis are relatively tolerant when it comes to pruning. Even with too much taken off or at the wrong time, they keep coming back. At worse, you may lose the following season’s flowers. When I inherited a few mature clematis plants that were overcrowded and tangled masses, I was initially fearful that I would kill the plant. But after a hard prune, they came back and with more vigour and healthier shoots.
Still unsure?
Pruning seems intimidating but is simple once you know which group your clematis belongs to. If you are still unsure what variety or group your clematis falls into, a safe bet is to wait and see – leave it for a year. It will be apparent when it flowers the following season. You can always do a hard prune every few years to rejuvenate an overgrown plant.
Tools Needed for Pruning Clematis
Below is the list of essential tools needed to prune any group of clematis. Annual pruning is necessary encourage a healthy growth habit and blossoms:
- Pruners – Bypass pruners are the most popular choice for gardeners and a must in a pruner’s tool kit. Bypass means the blades pass each other in a scissor-like action providing a clean cut without splintering the stem’s edge. The anvil garden pruner, where the upper blade cuts against a lower flat edge, must always be kept sharp. Otherwise, it will crush the stem while trying to cut it.
- Garden Gloves – Gardening gloves help keep hands clean and provide protection. Fabric gloves with vinyl offer a good grip on the fingers and palm. Good for warmer weather.

Troubleshooting Common Problems
Clematis Wilt: Stems suddenly collapse and turn black. Don’t panic! Cut the affected stems back to healthy growth, clean your shears, and dispose of the debris. The plant will often re-grow from its buried nodes and roots. Ensure good air circulation and avoid overhead watering.
No Flowers: Usually caused by too much shade, improper pruning (cutting off the flower buds), or a lack of nutrients.
Powdery Mildew: A white powder on leaves. Improve air circulation and treat with a fungicide if necessary.
Pro Tips for a Stunning Display
“Lasagna Planting”: Plant different clematis groups together. A Group 3 clematis pruned hard will provide a base, while a Group 2 clematis can grow through it for an early and late season show.
Companion Planting: Let your clematis scramble through sturdy shrubs like roses or hydrangeas for a beautiful, layered effect.
Container Growing: Clematis can thrive in large, deep pots. Ensure excellent drainage and be vigilant about watering.
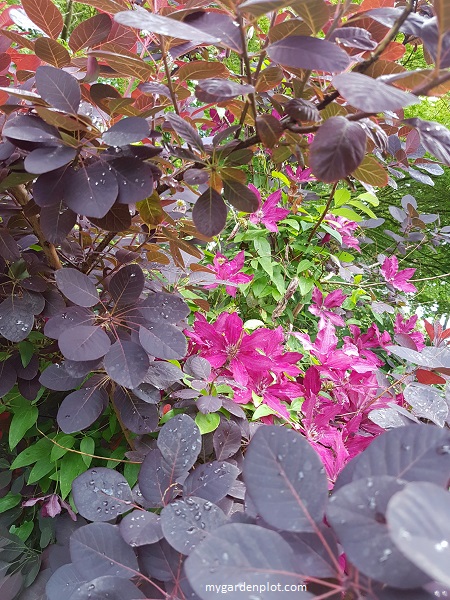
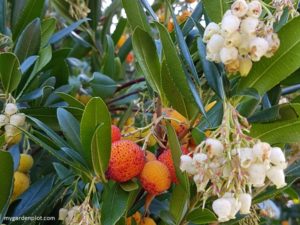
Clematis Supported on Trees
Natural supports for clematis like a tree trunk is a beautiful way to create attractive interest and contrast in a garden. The tree’s bark provides a natural grip for the clematis. Here are a couple of tree ideas.
READ MORE: Growing Smoke Trees and Japanese Maple Tree Care